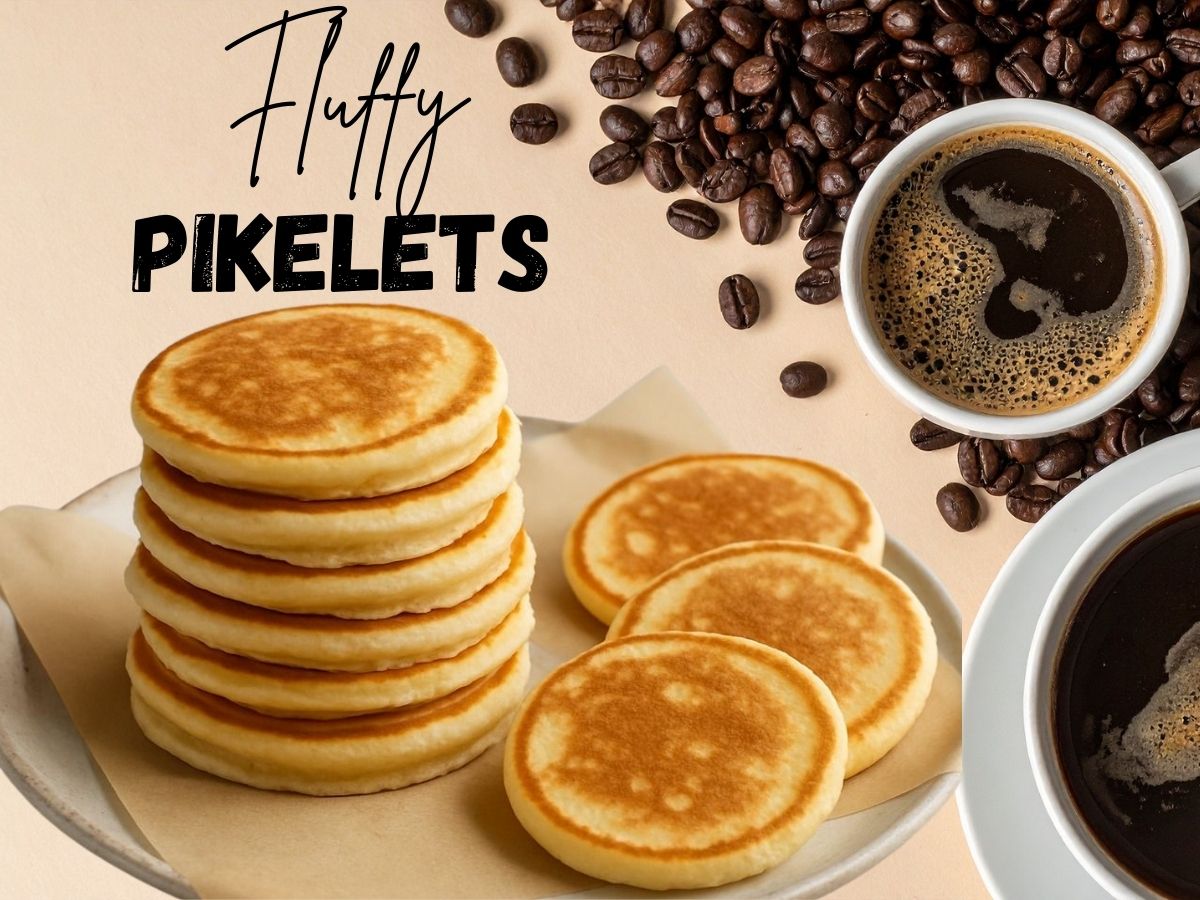
If you’ve ever wanted a quick, delicious snack that’s somewhere between a pancake and a crumpet, then pikelets are exactly what you need. These little golden rounds are a beloved treat in Australia and New Zealand, perfect for morning tea, afternoon snacks, or whenever you need something sweet and satisfying.
Making pikelets at home is surprisingly easy. You probably have all the ingredients already sitting in your kitchen. In just about 20 minutes from start to finish, you can have a plate of warm, fluffy pikelets ready to enjoy with butter and jam. They’re great for kids, perfect for using up ingredients, and absolutely delicious fresh off the pan.
Whether you call them pikelets, drop scones, or small pancakes, this recipe will show you how to make them perfectly every single time.
What Are Pikelets?
Pikelets are small, thick, fluffy griddle cakes that are popular in Australia, New Zealand, and parts of the UK. They look like mini pancakes but have a slightly different texture and taste. The batter is a bit thicker than regular pancake batter, which gives pikelets their characteristic fluffy, cake-like texture.
The name “pikelet” has interesting roots. Some food historians believe it comes from the Welsh word “bara pyglyd” meaning pitchy bread, while others think it evolved from “pickelet,” an old English term for a thin crumpet.
Pikelet Origin
The pikelet origin story is a bit fuzzy, but these treats have been around for centuries. They likely started in Wales and spread throughout Britain before making their way to Australia and New Zealand with early settlers. In different regions, the term “pikelet” means slightly different things. In some parts of England, pikelets are thin like crêpes, but in Australia and New Zealand, they’re always these thick, fluffy little cakes.
Over time, pikelets became a staple of Australian morning and afternoon tea culture. Grandmothers across the country have been making them for generations, often using old fashioned pikelet recipes passed down through families.
Pikelet vs Pancake
So what’s the difference between pancakes and pikelets? While they’re similar, there are some key distinctions:
Size: Pikelets are much smaller, usually about 7-8cm across (roughly 3 inches). Pancakes are typically larger, around 12-15cm across.
Thickness: Pikelets are quite thick and fluffy. Pancakes can be thin (like American flapjacks) or thick, depending on the style.
Batter: Pikelet batter is thicker and often includes more rising agent, which creates a fluffier texture.
Cooking method: Pikelets are cooked at a slightly lower temperature and are never flipped multiple times. You flip them just once.
Serving: Pikelets are usually served cold or at room temperature with butter and jam. Pancakes are typically served hot with syrup.
Cultural context: Pikelets are an afternoon tea snack in Australia and New Zealand. Pancakes are more of a breakfast food in most countries.
Pikelet vs Crumpet
People often confuse pikelets with crumpets, but they’re quite different:
Texture: Crumpets have distinctive holes throughout from yeast fermentation and are cooked in rings. Pikelets are smooth and spongy without holes.
Ingredients: Crumpets use yeast as the rising agent. Pikelets use baking powder or self-raising flour.
Cooking: Crumpets are cooked only on one side in a ring mold. Pikelets are free-form and flipped once.
Serving: Crumpets must be toasted before eating. Pikelets are eaten as-is, fresh from the pan or cold.
Taste: Crumpets have a slightly tangy, yeasty flavor. Pikelets taste sweeter and more cake-like.
In some parts of England, confusingly, the word “pikelet” actually refers to what Australians would call a crumpet! But in this recipe, we’re making the Australian-style pikelet.
Recipe Overview
| Prep Time | 5 minutes |
| Cook Time | 15 minutes |
| Total Time | 20 minutes |
| Yield | About 16-18 small pikelets |
| Difficulty | Easy |
| Cuisine: | Australian/New Zealand |
This old fashioned pikelet recipe is as simple as they come. No fancy equipment needed, no complicated techniques. Just mix, pour, flip, and enjoy. Even kids can help make these, which makes them a fun family cooking activity.
Ingredients
Main Ingredients:
- 1 cup (150g) self-raising flour
- 2 tablespoons caster sugar (superfine sugar)
- 1 large egg
- ½ cup (125ml) milk
- 1 tablespoon melted butter, plus extra for cooking
- ½ teaspoon vanilla extract (optional)
- Pinch of salt
To Serve:
- Butter
- Strawberry jam
- Honey
- Whipped cream
- Fresh berries
Functions of different ingredients in Pikelet recipe ?
The beauty of pikelets is their simplicity. You only need basic pantry ingredients:
Self-raising flour provides both the structure and the rise. This is the most important ingredient. Self-raising flour already contains baking powder mixed in.
Sugar adds sweetness and helps with browning. Caster sugar dissolves quickly, but regular granulated sugar works too.
Egg binds everything together and adds richness.
Milk creates the batter consistency and adds moisture. Whole milk works best for flavor.
Butter makes them tender and adds delicious flavor.
Vanilla is optional but adds a lovely aroma.
Salt enhances all the other flavors.
That’s it! No complicated ingredients, no hard-to-find items. Just simple, everyday ingredients that create something delicious.
Method
Prepare Your Ingredients
Start by getting everything ready. Crack your egg into a bowl. Measure out your milk. Melt your butter and let it cool slightly (you don’t want it so hot that it cooks the egg). Having everything measured and ready makes the process much smoother.
Mix the Dry Ingredients
In a medium mixing bowl, add the self-raising flour, sugar, and a pinch of salt. Give it a quick stir with a whisk or fork to mix everything together and break up any lumps in the flour. This step ensures your sugar and salt are evenly distributed.
Combine Wet Ingredients
In a separate smaller bowl or jug, whisk together the egg, milk, melted butter, and vanilla extract if you’re using it. Make sure everything is well combined and the egg is fully beaten into the liquid.
Step 4: Make the Batter
Pour the wet ingredients into the dry ingredients. Using a wooden spoon or whisk, stir everything together gently. Mix until just combined. Here’s the important part: don’t overmix! A few small lumps are completely fine. Overmixing develops the gluten in the flour and makes your pikelets tough instead of fluffy. Stop stirring as soon as you don’t see any dry flour.
Your batter should be thick but still pourable. It should drop off a spoon in thick globs rather than pouring smoothly. If it seems too thick, add a tiny splash of milk. If it’s too runny, add a teaspoon of flour.
Let the Batter Rest
Let your batter sit for about 5 minutes while you heat your pan. This resting time allows the flour to absorb the liquid fully and helps create fluffier pikelets.
Heat Your Pan
Place a large non-stick frying pan or griddle over medium heat. This temperature is important. Too hot and the outsides will burn before the insides cook. Too cool and they won’t get that lovely golden color. Medium heat is just right.
Add a tiny bit of butter to the pan. Let it melt and spread it around, then wipe most of it out with a paper towel. You want just a light coating. Too much butter and they’ll be greasy.
Cook the Pikelets
Using a tablespoon or small ladle, drop spoonfuls of batter onto the hot pan. Each pikelet should be about 6-8cm across (roughly the size of a tennis ball when dropped). Leave space between them as they’ll spread slightly.
Cook for about 1-2 minutes. You’ll know they’re ready to flip when you see bubbles forming on the surface and the edges look set and dry. The bottom should be golden brown.
Flip and Finish
Using a spatula, flip each pikelet gently. Cook for another 1-2 minutes on the second side until golden brown. The pikelets should feel springy when you press them lightly.
Transfer the cooked pikelets to a plate. You can keep them warm by covering them with a clean tea towel while you cook the remaining batter.
Repeat
Continue cooking the rest of your batter in batches. You might need to add a tiny bit more butter to the pan between batches, but not much. The pan gets better seasoned as you go, so later batches often turn out even better than the first ones!
Serve
Pikelets are traditionally served slightly cooled, not piping hot. Let them cool for a few minutes, then serve with butter and your favorite jam. Some people prefer them completely cold, which is also delicious.
Storage and Serving Temperature Guide
Serving Temperature
Unlike pancakes that are best served hot, pikelets are typically enjoyed at room temperature or just slightly warm. They’re perfect for morning tea or afternoon snacks served this way. The texture actually improves slightly as they cool, becoming more cake-like and easier to spread with butter and jam.
If you prefer them warm, that’s fine too! Just don’t serve them piping hot straight from the pan. Give them a minute or two to settle.
Storage Instructions
Room Temperature: Fresh pikelets can sit at room temperature for 2-3 hours if covered with a clean tea towel. This is fine for a morning tea or afternoon gathering.
Refrigerator: Store cooked pikelets in an airtight container in the fridge for up to 3 days. Layer them with baking paper in between to stop them sticking together.
Freezer: Pikelets freeze beautifully! This is great for making big batches. Let them cool completely, then place them in a single layer on a baking tray and freeze for an hour. Once frozen solid, transfer them to a freezer bag or container. They’ll keep for up to 3 months. The baking paper layers are helpful here too.
Reheating Tips
To enjoy your stored pikelets:
From the fridge: Just bring them to room temperature for 20-30 minutes. You can also warm them very gently in a low oven (150°C/300°F) for 5 minutes.
From the freezer: Thaw at room temperature for about 30 minutes, or microwave individual pikelets for 15-20 seconds. You can also pop them in the toaster on a low setting for a minute, which gives them a slightly crispy edge that’s quite nice.
Make-Ahead Tip: The batter doesn’t store well, so always cook all your batter when you make it. But you can make pikelets a day or two ahead and store them ready to serve.
Alternative Techniques and Ingredients
Different Cooking Methods
Electric Griddle: If you have an electric griddle, set it to 180°C (350°F). The flat surface means you can cook many pikelets at once, which is great for feeding a crowd.
Sandwich Press: Some people successfully make pikelets in a sandwich press! Add batter to the heated, lightly greased plates and close the lid gently. Cook for about 2-3 minutes. They’ll be slightly different in texture but still tasty.
Oven Method: For a hands-off approach, you can bake pikelets in a mini muffin tin. Fill each cup about two-thirds full and bake at 180°C (350°F) for 10-12 minutes. These will be more like mini muffins than traditional pikelets.
Ingredient Variations
Flour Alternatives:
- Plain flour plus 2 teaspoons baking powder instead of self-raising flour
- Half wholemeal flour, half white self-raising flour for a nuttier taste
- Gluten-free self-raising flour blend (results may be slightly less fluffy)
Milk Substitutes:
- Buttermilk creates extra fluffy, tangy pikelets
- Almond milk or oat milk for dairy-free options (pikelets will be slightly less rich)
- Half milk, half water for lighter pikelets
- Coconut milk for a tropical twist
Sugar Options:
- Honey instead of sugar (reduce milk slightly)
- Brown sugar for a caramel flavor
- Maple syrup for a different sweetness
- Stevia or sugar substitute for lower sugar content
Flavor Add-Ins:
- 1 teaspoon cinnamon mixed into the dry ingredients
- Zest of one lemon or orange
- 2 tablespoons cocoa powder for chocolate pikelets (add an extra teaspoon of sugar)
- Handful of blueberries or chocolate chips dropped into each pikelet as it cooks
Old Fashioned Pikelet Recipe Variations
Some old fashioned pikelet recipes have slight differences:
Traditional Version: Uses a bit more sugar (3 tablespoons) and no butter in the batter, just for cooking. This makes them slightly sweeter and lighter.
Grandmother’s Method: Some old recipes beat the egg white separately until fluffy, then fold it in at the end. This creates extra light pikelets.
Country Style: Add a tablespoon of golden syrup to the batter for a deeper, richer sweetness.
Tips and Tricks for Perfect Pikelets
What Is the Secret to Fluffy Pikelets?
The secret to perfectly fluffy pikelets comes down to a few key factors:
Don’t overmix the batter. This is the number one rule. Mix until just combined, even if you see a few lumps. Overmixing develops gluten, which makes pikelets tough and dense instead of light and fluffy.
Use fresh self-raising flour. Baking powder loses its power over time. If your self-raising flour is more than 6 months old, your pikelets might not rise properly. Check the date!
Get the consistency right. The batter should be thick enough to hold its shape when dropped from a spoon, but not so thick it’s difficult to pour.
Medium heat is crucial. Too hot and the outsides cook before the insides, leaving you with flat, hard pikelets. Medium heat allows them to rise gradually and cook evenly.
Let the batter rest. Even just 5 minutes helps the flour hydrate properly and creates better texture.
Room temperature ingredients. Cold milk and eggs don’t combine as well. Take them out of the fridge 15 minutes before starting.
More Helpful Tips
Testing Your Pan Temperature: Sprinkle a few drops of water on the pan. If they sizzle and evaporate within a couple of seconds, your pan is ready. If they just sit there, it’s too cool. If they bounce around wildly, it’s too hot.
Preventing Sticking: Even with non-stick pans, a light coating of butter helps. Don’t skip this step, but don’t use too much either.
Getting Even Sizes: Use the same spoon or measuring cup for each pikelet to keep them uniform. This also ensures they cook at the same rate.
Knowing When to Flip: Wait for those bubbles to appear on the surface and for the edges to look dry and set. Flipping too early means raw batter will spill out.
Keeping Them Warm: If you’re cooking a large batch, keep finished pikelets warm in a low oven (100°C/200°F) covered with foil. But honestly, they’re just as good at room temperature!
Preventing Flat Pikelets: If your pikelets are coming out flat, check your baking powder is fresh, make sure you’re not overmixing, and try using slightly less milk for a thicker batter.
Achieving Golden Color: A tiny bit of sugar in the batter helps browning. Also, make sure your pan is hot enough.
Nutritional Values
Per pikelet (based on 18 pikelets):
- Calories: 45-50 kcal
- Protein: 1.5g
- Carbohydrates: 8g
- Fiber: 0.3g
- Sugar: 1.5g
- Fat: 1g
- Saturated Fat: 0.5g
- Sodium: 80mg
Nutritional Notes:
These values are for plain pikelets without any toppings. Adding butter, jam, honey, or cream will increase the calorie count.
Pikelets are relatively low in calories per piece, which makes them a nice treat. However, they’re mostly made of refined carbohydrates, so they provide quick energy but not much fiber or protein.
To make them slightly more nutritious:
- Use wholemeal flour for added fiber
- Reduce sugar to 1 tablespoon
- Serve with fresh fruit instead of jam
- Use Greek yogurt instead of cream as a topping
That said, pikelets are a traditional treat meant to be enjoyed! They’re perfect for special occasions, afternoon tea, or when you want something sweet and comforting.
How to Make Simple Pikelets
The simplest possible method for pikelets:
- Mix 1 cup self-raising flour, 2 tablespoons sugar, and a pinch of salt
- Add 1 egg, ½ cup milk, and 1 tablespoon melted butter
- Stir until just combined (don’t worry about lumps)
- Drop spoonfuls onto a medium-hot buttered pan
- Wait for bubbles, flip once, cook until golden
- Serve with butter and jam
That’s honestly all there is to it! Don’t overthink the process. Pikelets are meant to be simple and quick. The whole process from measuring ingredients to eating warm pikelets takes about 20 minutes.
Frequently Asked Questions
How to make simple pikelets?
Mix self-raising flour, sugar, egg, milk, and melted butter until just combined. Cook spoonfuls on a medium-hot buttered pan until bubbles form, flip once, and cook until golden. The entire process takes about 20 minutes and requires no special skills or equipment.
What’s the difference between pancakes and pikelets?
Pikelets are smaller (about 3 inches across), thicker, and fluffier than most pancakes. They’re typically served at room temperature with butter and jam for afternoon tea, while pancakes are usually served hot for breakfast with syrup. The batter for pikelets is also thicker than pancake batter.
What is the secret to fluffy pikelets?
The main secret is not overmixing your batter. Mix only until the ingredients are just combined, even if you see lumps. Also use fresh self-raising flour, maintain medium heat while cooking, and make sure your batter is thick enough to hold its shape when poured.
Can I make pikelets without self-raising flour?
Yes! Use plain flour and add 2 teaspoons of baking powder to the recipe. Mix the baking powder thoroughly with the flour before adding the wet ingredients. The results will be very similar to using self-raising flour.
Why are my pikelets flat and not fluffy?
Flat pikelets usually result from overmixing the batter, old baking powder, or batter that’s too thin. Make sure your self-raising flour is fresh, mix gently, and check that your batter is thick rather than runny. Also, cooking on heat that’s too high can make them spread out flat.
Can I make the batter ahead of time?
It’s best to cook pikelets right after making the batter. The baking powder starts working as soon as liquid is added, so batter that sits around loses its rising power. If you must wait, refrigerate the batter and use it within an hour, but expect slightly less fluffy results.
Are pikelets the same as Scotch pancakes?
In the UK, what Australians call pikelets are often called Scotch pancakes or drop scones. They’re the same thing, just different regional names. However, in some parts of England, “pikelet” refers to a crumpet-like item, which can be confusing!
Can I freeze pikelet batter?
Freezing the batter isn’t recommended because the baking powder loses its effectiveness when frozen and thawed. However, cooked pikelets freeze wonderfully! Make your whole batch, freeze what you don’t need, and reheat later.
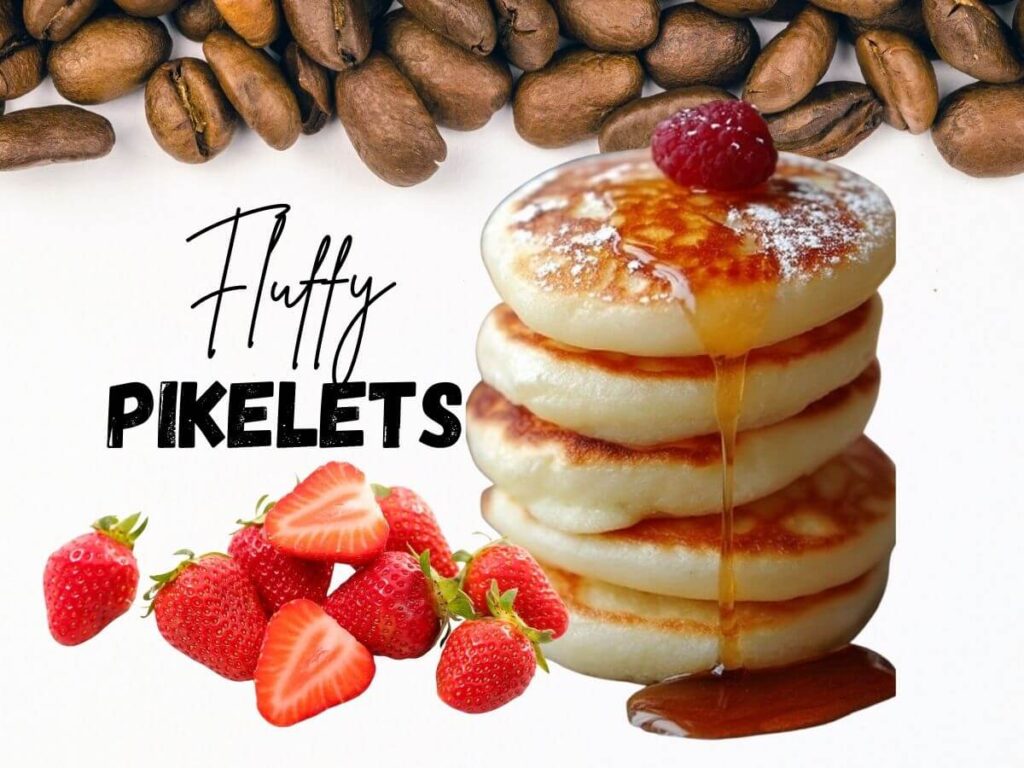
What can I serve with pikelets besides jam?
Pikelets are wonderfully versatile! Try them with honey, golden syrup, lemon curd, Nutella, peanut butter, maple syrup, fresh berries, whipped cream, or even savory toppings like cream cheese and smoked salmon.
How do I know when the pan is the right temperature?
Sprinkle a few drops of water on the pan. They should sizzle gently and evaporate within 2-3 seconds. If they just sit there, the pan is too cool. If they bounce around wildly, it’s too hot. You want a gentle, steady sizzle.
Can I make these dairy-free?
Yes! Use a non-dairy milk like almond, oat, or soy milk, and replace the butter with a dairy-free spread or a neutral oil like vegetable or sunflower oil. The flavor will be slightly different but still delicious.
Why are my pikelets burning on the outside but raw inside?
This means your pan is too hot. Reduce the heat to medium or even medium-low. Pikelets need gentle, even heat to cook through properly. They should take about 2 minutes per side.
Conclusion
Making pikelets at home is one of those simple pleasures that never gets old. With just a handful of basic ingredients and about 20 minutes, you can create these delicious little treats that are perfect for any time of day.
Whether you’re following this old fashioned pikelet recipe exactly or adding your own twist with chocolate chips or berries, the key is keeping things simple. Don’t overthink the process. Mix gently, cook on medium heat, and flip once when you see those bubbles appear.
Pikelets are more than just food. They’re part of Australian and New Zealand culture, linked to memories of afternoon tea at grandmother’s house, school lunchboxes, and lazy weekend mornings. Every family has their own way of making them, their own preferred toppings, and their own special memories connected to these golden little cakes.
Now that you understand the difference between pikelets, pancakes, and crumpets, and you know all the secrets to making them fluffy and perfect, it’s time to make your own batch. Get your ingredients together, heat up that pan, and in just a few minutes you’ll be spreading butter on warm, homemade pikelets.
The best part? Once you make them once, you’ll remember the recipe forever. It’s that simple. So go ahead and start a new tradition in your own kitchen. Your family will thank you, and who knows, maybe your pikelet recipe will become the one that gets passed down to the next generation.
Enjoy your pikelets!